Organizer guide: How to create and manage discount codes in Showpass
Showpass provides flexible options for offering percentage-based or fixed-amount discounts on tickets, memberships, and products. This guide walks you through how to create discount codes, customize where they apply, and manage limits or availability.
Step 1: Go to the Discounts page
- From your dashboard, select Discounts in the left-hand pop-out menu.
- Click Create Discount in the top-right corner.
Step 2: Fill in discount details
- Discount Type: Choose Discount Code for standard usage. For bulk or auto discounts, refer to those specific setup guides.
- Discount Code: This is the code buyers will enter at checkout.
- Description: This message will appear when the discount is applied.
- Discount Amount: Choose a percentage or fixed dollar value. (Note: Only fixed dollar amounts can be used for individual item discounts.)
Amount Off Options:
-
Entire Order: Applies to the full basket. Choose to apply to:
- All items
- Specific types (e.g., only tickets, memberships, or products)
- All except selected items
- Individual Items: Discount is applied to each item individually. Same filtering options as above apply.
Step 3: Enable or exclude specific categories
- Events: Select all events, certain events, or exclude some.
- Memberships: Enable for all or specific membership levels.
- Products: Include or exclude select merchandise or add-ons.
Use toggle switches to control each category’s inclusion.
Step 4: Set limits and usage rules
- Usage Limit per Customer: Limit how many times a single buyer can use the code (typically 1).
- Item Limit per Customer: Limit the number of discounted items in a basket (e.g., first 2 tickets only).
- Overall Usage Limit: Total number of times the code can be used across all buyers.
Activation Window:
- Set a start and end date/time. If left blank, the discount is active immediately with no expiration.
Acceptable Locations:
- Choose whether the discount can be applied online, at the box office, or both.
Step 5: Activate and save
- Toggle the discount status to Active or Paused before saving.
- Click Save to finish setup.
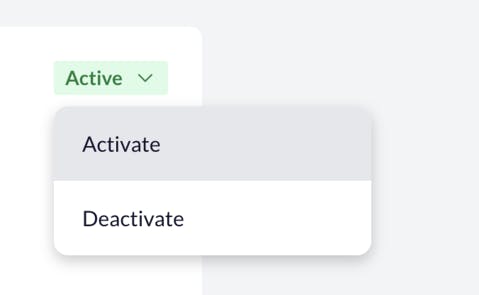
Your discount will now appear on the main Discounts page, where you can edit, deactivate, duplicate, or search codes by name or event.
Advanced use: Early release & multi-discounts
- Early Access: Use hidden or password-protected ticket types for pre-sales.
-
Multi-Discounts: To allow multiple codes to be used together, contact support to enable this feature. Keep in mind:
- Multiple percentage-based discounts stack directly (e.g., two 50% codes = 100%).
- They are not compounded (e.g., 50% then 50% off the remaining).
FAQs & Troubleshooting
Why can't I apply my discount to individual items?
Only fixed dollar discounts are supported for item-level use. Switch from percentage to fixed amount.
Can I edit a discount after people have used it?
Yes, but changes will only apply to future uses of the code.
Can I reuse a code that’s been deleted?
Yes, but make sure it's not already in use or assigned to another active discount.
Why isn’t my discount showing up at checkout?
Check that:
- It’s active
- It’s valid for the selected item(s)
- It’s usable at the chosen sales channel (e.g., Box Office or online)
Need support? Our team is here to help. Get in touch with us by filling out this contact form.